Escape from Tarkov is a difficult survival game where it helps to have some knowledge before jumping in. If you’ve seen a livestream or only just started playing, read our tips and tricks below to get an advantage. It’s easy to make simple mistakes without knowing the basics as a beginner.
Tip 1 – Difference Between PMC and SCAV
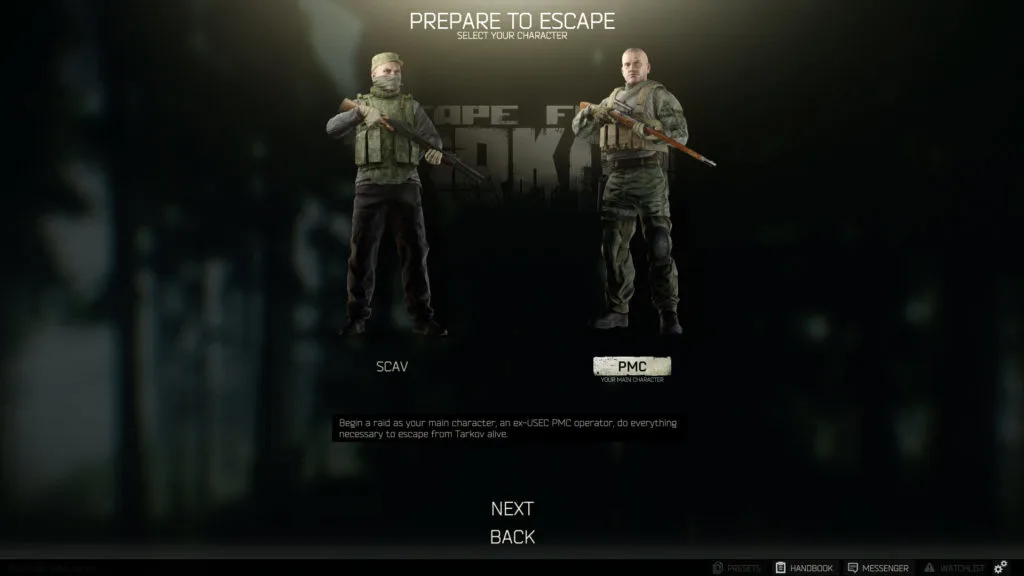
Prepare for your Tarkov raid with the right mentality by choosing the right character type, PMC or SCAV.
There are two ways to play Escape from Tarkov and one is riskier than the other. While you do need to pick USEC or BEAR when starting, this mainly only decides your PMC appearance. Even though USEC has a small advantage on the Lighthouse map. That aside, you’ll have to choose PMC or SCAV before playing.
PMC – This character goes in with whatever gear you equip from your stash. That also means if you die, you’ll lose that gear unless it’s insured. If you’re not sure how insurance works, continue reading down to Tip 3. Also, PMCs have access to a secure container that can’t be looted.
SCAV – SCAVs are given random gear that can’t be edited. When entering a raid, you join midway into the time limit after PMCs have spawned. By default, AI-controlled SCAVs won’t attack you unless you attack a SCAV. Assuming you don’t have low karma from attacking SCAVs as a SCAV.
The idea behind SCAV runs is you’re given free gear to gather more or extract with. However, SCAVs have a cooldown timer after each run. As you get further into Tarkov, you can upgrade parts of your Hideout to reduce that timer. Such as the Intelligence Center.
Tip 2 – How to Offline Raid/Mode
The offline raiding system is a great way to learn a map or get some practice in. You don’t have to worry about losing gear even though you won’t be able to leave with any or get experience. Fortunately, an update made it so you can now play offline with friends as well.
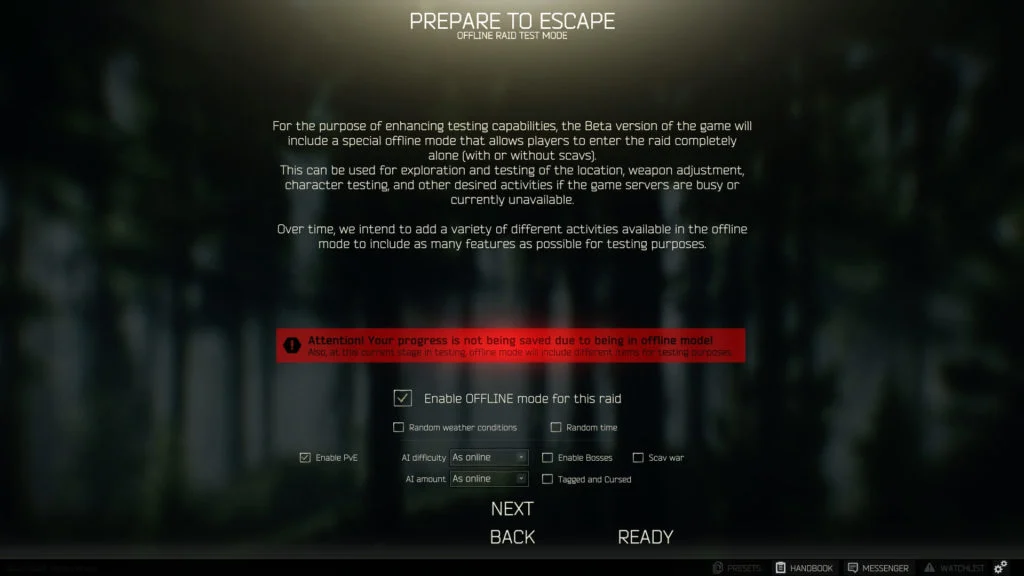
If you’re not sure how to offline raid in Tarkov, you’ll need to pick your PMC character and then click next until the Offline Mode screen above appears. Then, you’ll have to check the “Enable OFFLINE mode for this raid” box. You can customize it further with other settings too.
The various options let you choose the amount of AI, their difficulty level, and other settings too. Two fun settings to turn on are SCAV War and Tagged and Cursed.
Tip 3 – How to Insure Items in Tarkov
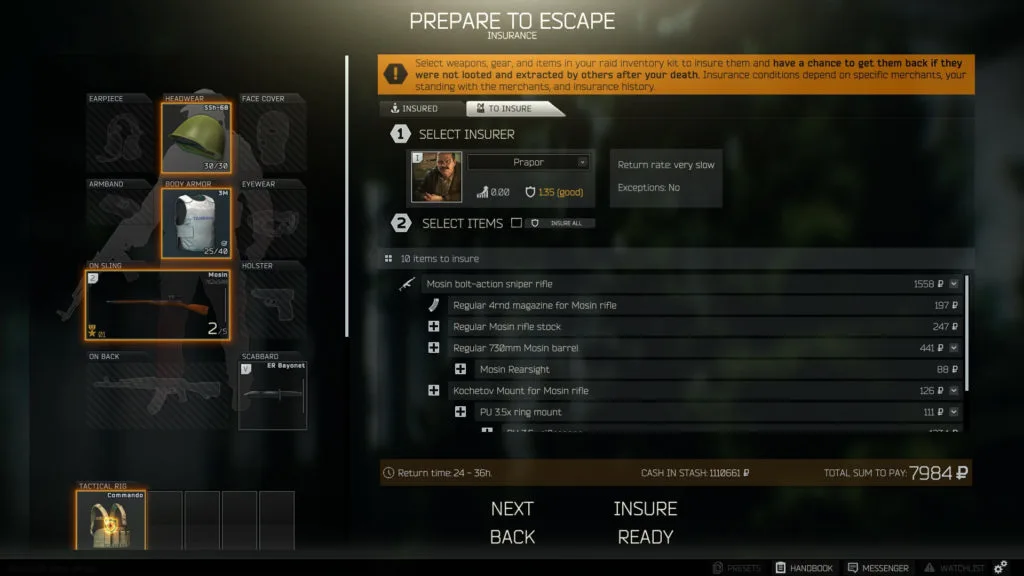
If you’re worried about losing gear as a PMC, insurance is a great way to counteract that. Insurance from Prapor or the Therapist makes it so your lost gear will return to you if it’s not looted by a player. It’s not an immediate return, but it gives you a fighting chance.
If an AI SCAV kills you, you’re more likely to get your gear back since they don’t loot bodies. Also, some players drop insured gear in hidden areas to make room for other equipment. This is an efficient way to keep your items while returning with even more.
| Time to Recover | Cost | |
| Prapor | 26 to 36 real hours | Cheap |
| Therapist | 12 to 24 real hours | Slightly More Expensive |
SCAV players are on their own because they can’t insure gear. So make sure you do your best to extract unless you’re just looking to explore and find action. Especially if you end up with a low raid timer. For those of you PMC players unsure of how to insure all items, there’s a button you can check visible in the screenshot above.
Tip 4 – How to Extract in Escape from Tarkov
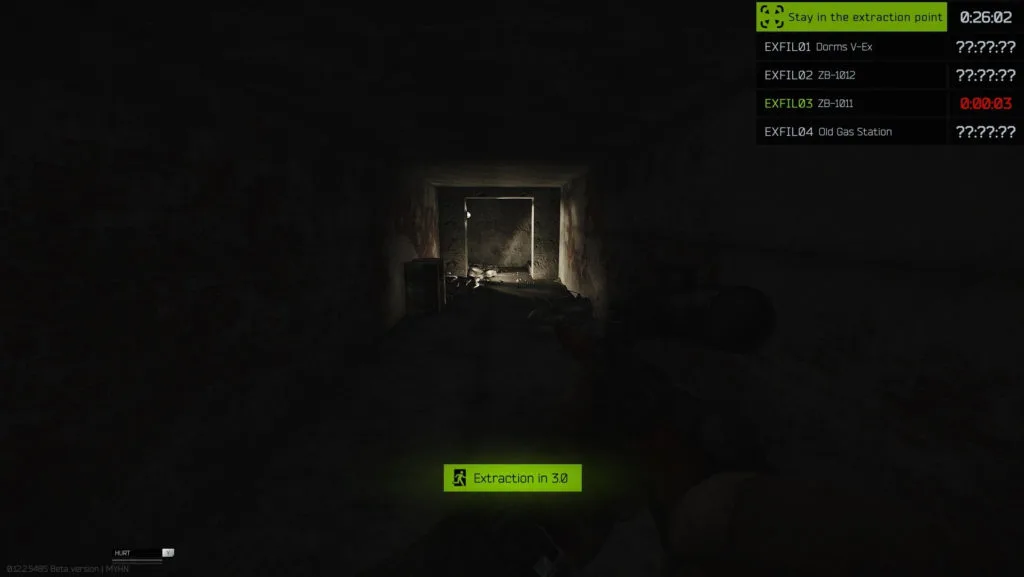
Getting to your extraction is satisfying but you’re still in danger until those seconds finish counting down.
One of the most important tips for your first raid is understanding how to extract. This can be frustrating if you don’t know the area and how certain extracts work. Especially since Tarkov doesn’t really teach you anything and throws you in blind.
How to Know Where to Extract
First, when you enter a raid, tapping “O” twice by default will show your extract points at the top right. Each extraction with question marks means it’s not a guaranteed extraction. Those with question marks may require money, a key, or simply a light being lit. You can visit the Tarkov Guide Hub for every map guide we have alongside their extracts.
PMCs Have More Extract Points
Second, if you’re a PMC, you have access to more extract points than a SCAV player. It’s worth knowing that grouped players always have some extract points in common.
MIA Insurance if Time Runs Out
Escape from Tarkov uses a time limit for every raid where you lose your gear if you don’t extract. This leads to an MIA status where your gear is forfeited but returned if insured. This is known as MIA Insurance. However, loot that you found during the raid will be lost.
Tip 5 – Day Night Cycle in Tarkov
Knowing the day and night cycle in Escape from Tarkov is important for how you’re geared. If you go into a dark raid without night vision, you’re going to have a bad time. While daylight will vary at dawn and dusk, estimated hours for the day night cycle are below. Most players will want to take advantage of the daylight hours.
Daytime from 6:00 to 22:00
Night from 22:00 to 06:00
Tip 6 – How to Heal Injuries in EFT
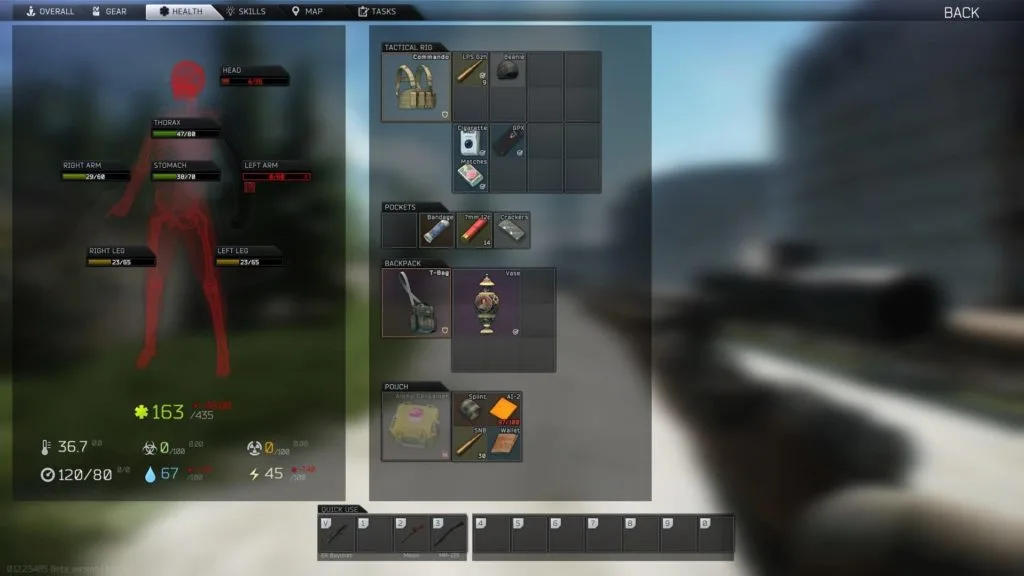
When you open your inventory and visit the Health tab, as shown above, you can see every limb. If you’re hurt or have a broken limb, you’ll see it here. As a new player, it’s important to understand how healing each injury works. If a limb is red or slightly damaged, an AI-2 Medkit will heal that health bar up. However, other meds such as bandages are required for negative effects like Bloodloss.
If a limb is black as the above screenshot shows for my left arm, it’s considered destroyed. This means it can only be healed with a CMS Kit or Surv12 Field Surgical Kit. These are less common to find so they’re quite valuable. However, if you don’t have them available, you can use Painkillers to temporarily fight that negative effect.
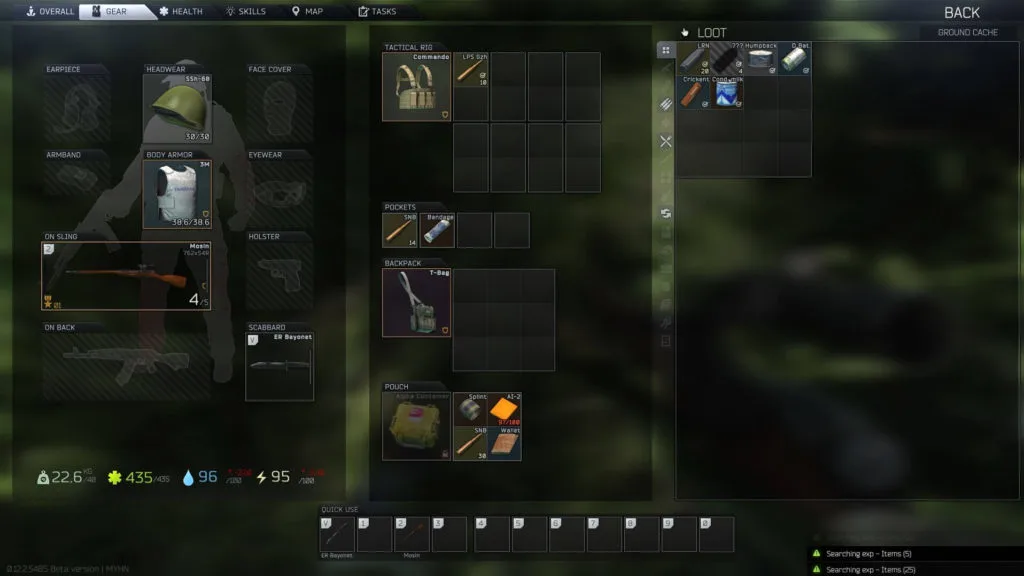
Common meds for beginners that are often worth keeping in a secure container are below. Keep in mind, if it’s in your container, you won’t be able to hotkey it to your bar. This helps for pressing a number to heal quickly without needing to open your inventory. That’s why many Tarkov players always have their hotkey bar visible.
- Aseptic Bandage
- AI-2 Medkit
- Immobilizing Splint
Another useful healing tip is that your PMC will heal over time in between raids. Otherwise, you’ll want to heal them back up before heading out. You don’t want to go into a raid with low health, energy, and dehydration. Fortunately, you can spend money to heal your injuries and/or health via the Therapist when exiting a raid.
Tip 7 – What Items to Keep?
Knowing what items to keep while looting is one of the tougher parts of Escape from Tarkov. The best way to learn this is by simply playing the game and checking the value of different items. More experienced players know how to take full advantage of the space they have with the value of the items they find.
As a beginner player, I recommend looking for items to build your Hideout or to sell for money. Tarkov updates have changed the market several times making it more difficult to get what you need. So players are more reliant on the traders when they’re first starting out. This is why I like to raid for gear I can use in the next round.
Tip 8 – Which Dealers to Sell Items To
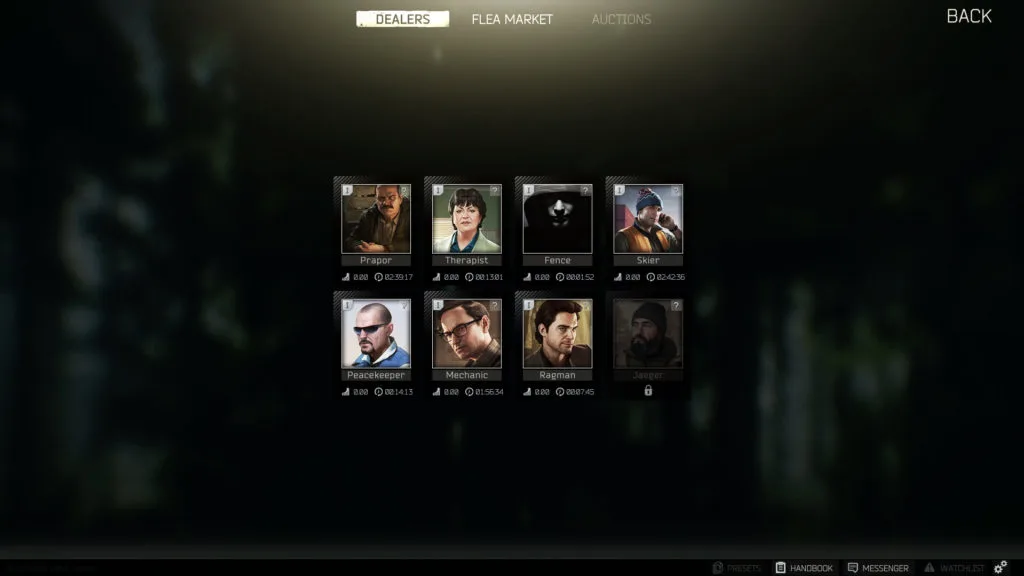
There are eight different dealers alongside the Flea Market with preferred items that they’ll buy. If you want to get the most money out of your items, be sure to sell to the right dealer. And once you hit level 5, you’ll realize that some items are more profitable on the Flea Market.
Certain dealers sell more items when upgraded through a loyalty system. This relies on completing tasks, leveling up, and buying/selling items to them. Depending on who you want to upgrade, this may affect your selling habits.
| Sell These Items to Them | Notes | |
| Prapor | Ammo | Buys most items, but rarely for the highest price. |
| Therapist | Medicine, food, electronics, keys, barter items | |
| Skier | Weapon mods, backpacks, and clothing. | Won’t buy all weapon mods. |
| Mechanic | Gun frames, weapon mods, ammo | Won’t buy all weapon mods. |
| Ragman | Clothing | Primarily for leveling, otherwise, sell to Skier. |
| Fence | Only items that others won’t buy like knives. | Buys at the lowest and sells at the highest. SCAV reputation influences prices as well. |
| Peacekeeper | Guns | USD currency only. |
| Jaeger | N/a | Locked until completing a quest. |
Tip 9 – Examine Items to Save Time Later
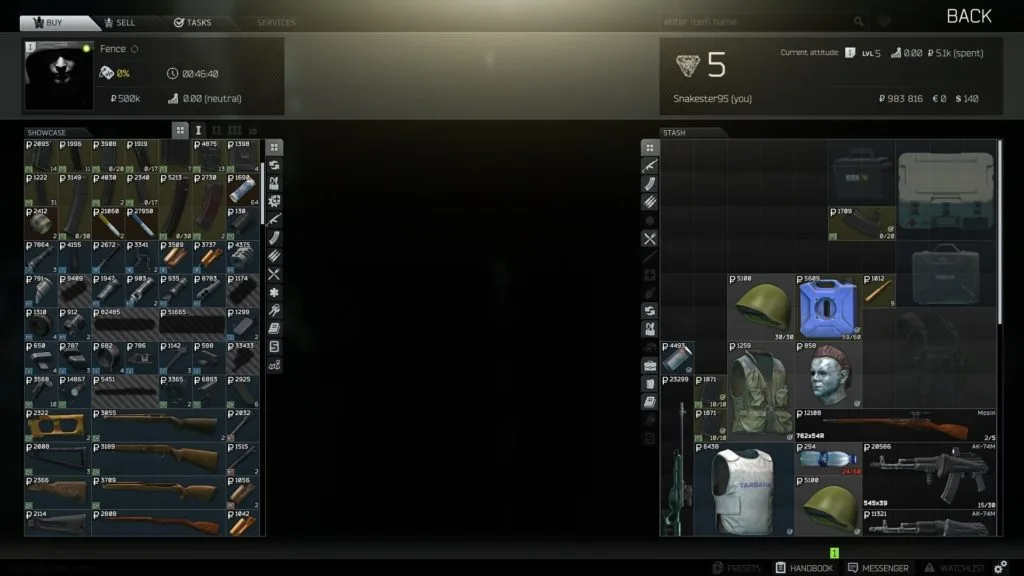
When you first start Escape from Tarkov, most items are hidden and show as an “Unknown Item”. These are identifiable by examining them in-game, in dealer inventories, and in the Flea Market. Each time you examine an item, it gives a small amount of experience and permanently identifies it. This saves a lot of time when you’re in a raid and aren’t sure what to loot.
Despite the unfair prices of the Fence, you can often find Unknown Items. Until the Flea Market unlocks, this is a nice way to get ahead. If you have the stash space, save your Dog Tags and knives to barter for other items.
Tip 10 – How to Level Up Skills in Tarkov
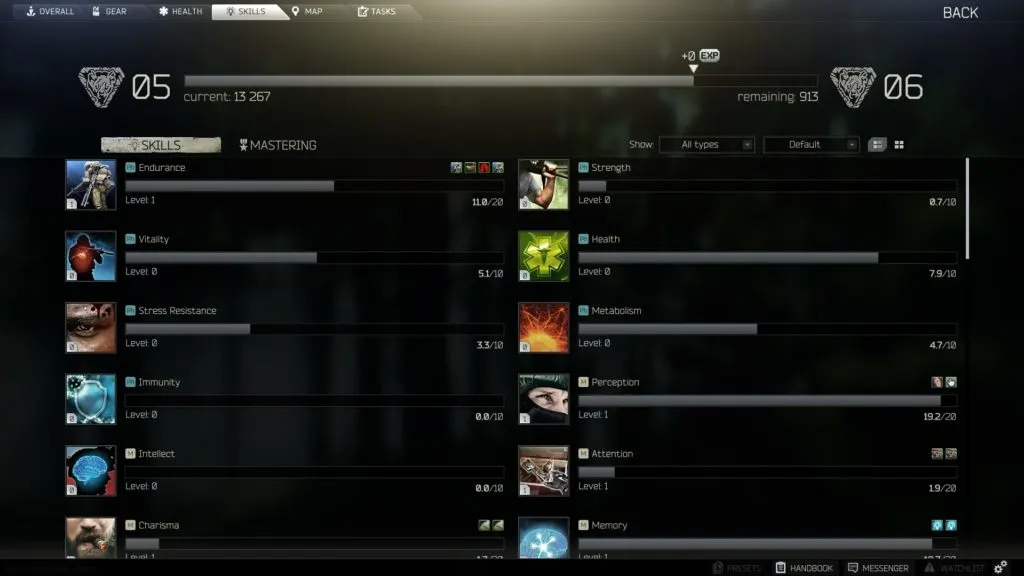
Escape from Tarkov skills passively provide major advantages depending on their level. Similar to early games in The Elder Scrolls franchise, you level your skills by using them. If you want to raise your Attention skill, loot more containers. If you want better recoil with a certain weapon, use that type often.
Just a reminder as mentioned previously, the Offline mode doesn’t provide any experience even though it may seem like it. Here are a few examples of skills and their benefits below:
- Attention – Increased looting speed and chance for better loot.
- Health – Decreased chance of fractures. Decreases energy consumption and dehydration rate. Increased health regen outside raids.
- Perception – Increases hearing distance, loot detection radius, and enhances aiming. Loot detection radius seems to deal with how easily the white dot cursor appears when looting items.
That’s all there is for our beginner guide on getting started in Escape from Tarkov. Be sure to comment below if you have some tips of your own to help others. Visit the Tarkov Guide Hub for more useful information. Or take a look at one of the guides I’ve recommended below.

Jeff is a journalist with over 10 years of experience writing, streaming, and making content about video games. With an associate degree in journalism, he’s a sucker for RPGs, survival games, roguelikes, and more.

